Embarking on your quilting journey can be as thrilling as it is intricate. Freestyle Swimming Foundations: A Beginner’s Guide to Getting Started is designed to guide novices through the delightful craft of quilting, from selecting patterns to mastering the art of free motion quilting. With a touch of creativity and the right techniques, you’ll soon transform simple fabrics into stunning works of art. Let’s stitch together the key takeaways to set you on the path to becoming a quilting aficionado.
Key Takeaways
- Begin with choosing a quilting pattern that resonates with your style, whether it’s freehand improvisation or using stencils for guidance.
- Prepare your quilt sandwich meticulously, and practice your designs on paper to familiarize yourself with the motion before sewing.
- Start your quilting journey with smaller projects to build confidence before progressing to larger and more complex quilts.
- Advance your skills by exploring techniques like foundation paper piecing and engaging with the quilting community for inspiration.
- Apply unique strategies from other disciplines, like hand fighting techniques from wrestling, to enhance control and precision in your quilting.
Laying the Groundwork: Choosing Your Quilting Pattern
Going Freehand: Embracing the Improvisation
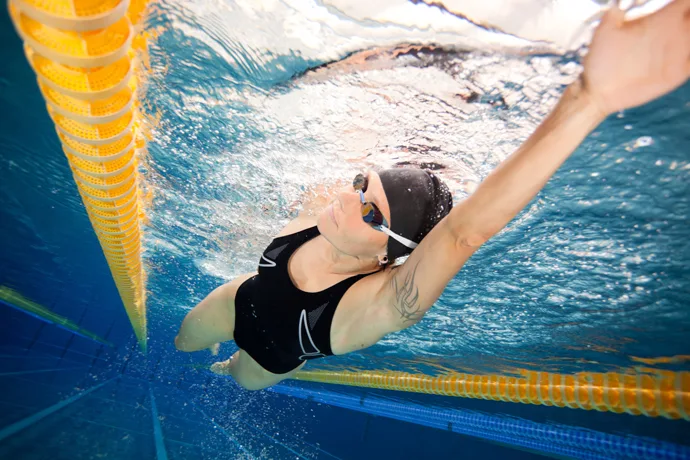
Diving into the world of free motion quilting can be as exhilarating as it is creative. Going freehand is all about embracing the improvisation that comes with moving the fabric freely under the needle, creating patterns that are uniquely yours. It’s a bit like freestyle kick drills in swimming; you’re developing a rhythm and style that’s all your own.
Before you start, it’s crucial to decide on the quilting pattern or shapes you envision. Whether it’s stippling, wavy lines, or spirals, the choice is yours to make. If you’re new to this, consider practicing your designs on paper first. It’s a great way to get comfortable with the movements without the commitment of thread and fabric.
As you begin sewing your layers together, let your hands guide the fabric, creating a trail of stitches that reflects your personal touch. Remember, this is your canvas, and there are no mistakes here, just unique creations waiting to unfold.
If you’re looking for design inspiration, there’s a plethora of free motion quilting patterns to explore. And as you progress, you’ll find that this technique becomes more intuitive, allowing your confidence and skills to flourish.
Using Stencils: Guiding Your Stitches
Stencils can be a game-changer for those who want a bit of structure in their free motion quilting adventure. Pick up a stencil that resonates with your style and get ready to create a masterpiece with precision. Here’s how you can get started:
- Place your chosen quilt stencil on top of the fabric.
- Trace the pattern using a fabric marker, moving the stencil as needed.
- Repeat the process to build up a tiled pattern across your quilt.
Once you’ve traced your pattern, it’s time to bring it to life with your sewing machine. Start at a selected spot and secure your thread with a few reverse stitches.
Remember to have backup bobbins ready to go, so you can keep the flow going without interruption. When you’re done, trim and bind your quilt edges for a clean finish. With stencils, you’re not just quilting; you’re creating a work of art that’s uniquely yours.
Finding Inspiration: Exploring Quilting Patterns
Once you’ve got the basics down, it’s time to dive into the vast sea of quilting patterns. Finding the right pattern can spark a world of creativity, setting the stage for a truly unique quilt. Here’s a quick guide to get those inspiration juices flowing:
- Browse online resources: Websites like Fat Quarter Shop offer a treasure trove of ideas, from Charm Pack patterns to Jelly Roll patterns, and even baby quilts.
- Check out quilting magazines: Publications such as Love Patchwork & Quilting are filled with the latest trends and techniques.
- Explore free patterns: Many sites provide free quilting patterns for beginners and advanced quilters alike.
When in doubt, start simple. Practice with pen and paper, sketching out free-motion quilting patterns before bringing them to life on fabric.
Remember, the key to a stunning quilt is often a blend of precision and personal touch. So, whether you’re using a stencil for uniformity or going freehand for a more organic feel, make sure to infuse your work with a bit of your own flair!
Prepping Your Quilt: The Basting Basics
Creating the Perfect Quilt Sandwich
Think of your quilt sandwich as the foundation of your masterpiece. Getting this base right is crucial for a smooth quilting experience. Start by laying out your backing fabric, right side down, and smoothing out any wrinkles. Next, layer on the batting, ensuring it’s flat and even. Finally, place your quilt top over the batting, right side up, and smooth it out from the center towards the edges.
Here’s a quick checklist to help you remember what you need:
- Sewing machine
- Thread
- Free motion quilting foot or darning foot
- Basting spray (1 can)
- Patchwork quilt top
- Wadding or batting
- Quilt backing fabric
- Safety pins
- Quilting stencils
- Air drying pen
Once your layers are in place, it’s time to secure them. Spray the wadding with basting spray and gently press the quilt top onto it. For added security, and to keep the layers from shifting, add safety pins across the quilt. The number of pins will vary depending on the size of your quilt, but a good rule of thumb is to pin every other row of quilt blocks.
Basting well now means less puckering and shifting later, so take your time with this step. It’s the prep work that makes the quilting shine!
Adjusting Your Sewing Machine Settings
Before diving into the world of free motion quilting, it’s crucial to get your sewing machine settings just right. Adjusting the tension is key to ensuring your stitches come out looking perfect. For many machines, a tension setting between 7 and 8 is a good starting point, but always remember to do a test run on a scrap sandwich to fine-tune your settings.
Here’s a quick checklist to get your machine ready:
- Lower the feed dogs to allow for smooth movement of your quilt.
- Attach a free motion quilting foot or darning foot.
- Set your stitch length to 0, as you’ll control the stitch length manually.
- Reduce the foot pressure to the lowest setting for better control.
Pro Tip: Create a tester sandwich with scrap fabric and batting to check for tension or stitch length issues before you start on your actual quilt.
Once you’ve made these adjustments, you’re all set to begin your quilting adventure with confidence!
Doodling Designs: Practicing on Paper First
Before you dive into the world of fabric and thread, it’s a smart move to get your patterns down on paper. Think of it as a quilting sketchbook where your needle is the pencil. This step is all about letting your hands learn the motions without the commitment of stitches.
- STEP 1: Grab a pen and paper and start doodling. Simple swirls, loops, and geometric shapes are great starters.
- STEP 2: If you’re aiming for precision, consider using a stencil to outline your patterns.
- STEP 3: Once you’re happy with your paper designs, it’s time to bring them to life on your quilt.
Transitioning from paper to quilt can feel like a big leap, but your practice sessions are the bridge. The confidence you gain from doodling will make guiding your sewing machine feel like second nature.
Remember, the goal isn’t to create a masterpiece on your first try. It’s about building muscle memory and getting comfortable with the movements. So, keep it light, have fun, and watch as your paper doodles transform into beautiful quilted art.
Read more: 5 Essential Drills to Enhance Your Freestyle Swimming Technique
The First Stitch: Beginning Your Free Motion Quilting Journey
Starting Small: Cushion Covers and Baby Quilts
Diving into the world of free motion quilting can be a thrilling adventure, and starting with smaller projects like cushion covers or baby quilts is the perfect way to dip your toes in the water. These manageable pieces allow you to focus on technique without feeling overwhelmed by the size of the project.
When you begin, aim to quilt a row of patterns across your quilt or tackle one block at a time. This methodical approach helps you to secure the entire quilt sandwich step by step, ensuring that each section receives your full attention.
As you gain experience with each small project, you’ll find your confidence growing. The transition to larger quilts will feel less daunting, and you’ll be quilting with ease in no time.
Remember, the key to quilting success is practice. Embrace each stitch, and don’t shy away from experimenting with different patterns and techniques. Before you know it, you’ll be ready to take on more complex designs and larger quilts, all while enjoying the creative journey.
Building Confidence: Progressing to Larger Projects
Once you’ve got the hang of smaller pieces, it’s time to scale up your quilting canvas. Tackling larger projects can seem daunting, but it’s just a matter of dividing and conquering. For quilts that are larger or use pin basting, begin in the quilt’s heart and work your way outwards, section by section.
As you progress, remember that every stitch is a step forward. Celebrating quilty progress is essential, as each part of the process contributes to your masterpiece.
Here’s a quick checklist to keep you on track:
- Start at the center of your quilt
- Divide the quilt into four equal sections
- Sew outwards from the center, completing each quarter
- Ensure each block is secured before moving on
With each project, you’ll find your rhythm and refine your techniques. And before you know it, you’ll be quilting with the confidence of a seasoned pro!
Quilting Techniques: From Basic to Pro
Once you’ve got the hang of the basics, it’s time to dive into the deep end with some freestyle drills for beginners. These drills are designed to refine your technique and add complexity to your quilting repertoire. Think of them as the freestyle swimming tips for beginners, but for quilting! They’ll help you move smoothly from simple patterns to intricate designs that will make your quilts stand out.
As you progress, remember that swimming freestyle technique for beginners applies here too: start slow, focus on form, and gradually increase complexity. The same goes for quilting; begin with freestyle for beginners and build up to more advanced patterns.
Here’s a quick rundown of freestyle swimming steps that can be adapted to quilting:
- Warm up with basic patterns to get into the groove.
- Practice stitching straight lines and then move on to curves.
- Increase the difficulty by adding in more complex shapes.
- Challenge yourself with speed and precision drills.
And if you’re looking for a structured way to level up, consider enrolling in a class like FMQ201M24: Free Motion Quilting 201 Advanced Designs May 2024. This course promises to take your skills to the next level with more advanced designs and techniques.
Beyond the Basics: Advancing Your Quilting Skills
Exploring Foundation Paper Piecing
Diving into foundation paper piecing (FPP) can be a game-changer for quilters looking to achieve precision in intricate patterns. It’s a technique where you sew fabric to a paper template, which guides you to perfect alignment and sharp points that might be tricky with traditional piecing methods.
Here’s a quick rundown on getting started with FPP:
- Begin with simple patterns to get the hang of the process.
- Use thin paper to make removing it easier after sewing.
- Shorten your stitch length to perforate the paper for easy removal.
FPP is all about the details. Take your time, and don’t rush the process. Precision is key, and with each piece you sew, you’ll see your skills flourish.
Once you’re comfortable with the basics, challenge yourself with more complex designs. You’ll find that FPP opens up a world of possibilities, allowing you to create designs that were once too daunting to attempt. And remember, practice makes perfect. The more you sew, the more confident you’ll become in your FPP abilities.
Perfecting Your Techniques Through Practice
As you continue on your quilting journey, the mantra ‘practice makes perfect’ couldn’t be more true. Dedicate time to refining your skills, and you’ll see your quilting flourish. Start by setting aside regular practice sessions, focusing on the areas you find most challenging.
Incorporate ‘drills for breathing in freestyle’ into your routine. These drills help maintain a rhythm and flow in your work, much like a swimmer pacing their breaths during a race. It’s about finding that steady pace that allows for precision and consistency in your stitches.
Here’s a simple practice schedule to get you started:
- Monday: Focus on straight-line quilting
- Wednesday: Experiment with curved patterns
- Friday: Combine straight and curved lines in complex designs
Embrace the process of continuous improvement. Each stitch is a step forward in your quilting journey.
Remember, every quilter was once a beginner. Take inspiration from resources like ‘Learn How to Quilt, The Best Series for Beginners – Madam Sew’, which offers a step-by-step tutorial that’s a goldmine for any novice.
Joining the Quilting Community for Inspiration
Quilting isn’t just about stitching and patterns; it’s a vibrant community brimming with inspiration and support. Joining a quilting community can be a game-changer for your craft, offering a wealth of resources, from shared patterns to troubleshooting tips.
One such community is Interwoven – an online sewing and quilting community from Quiltd Studios. It’s similar to a sewing group or quilting guild that you might join, but with the convenience of connecting from anywhere. Here’s a quick rundown of what you might find in a typical online quilting community:
- Discussion forums for sharing tips and seeking advice
- Pattern libraries with free and premium designs
- Member galleries to showcase your projects
- Group challenges to stretch your skills
- Webinars and tutorials from experienced quilters
Embrace the collective wisdom of fellow quilters. Their insights can help refine your techniques and introduce you to new ideas that can transform your quilting journey.
Remember, every quilter was once a beginner. By engaging with others, you’ll find encouragement and motivation to keep pushing your boundaries and perfecting your craft.
Wrestling with Fabric: Hand Fighting Techniques in Quilting
Controlling the Quilt: Tips from the Mat
Just like in wrestling, controlling your quilt is all about leverage and grip. Start at one corner of your project, whether it’s a small cushion or a sprawling quilt, and work your way across, securing rows and blocks as you go. This methodical approach helps you maintain control and avoid the fabric bunching up.
- STEP 3: Adjust your stitch length to zero for free motion quilting.
- STEP 4: Lower your foot presser speed to gain more control.
- STEP 5: Trim and bind your quilt edges to finish.
Free motion quilting can be incredibly rewarding, and with practice, it becomes second nature. Begin with smaller projects to build your confidence before tackling larger quilts.
Remember to square up your quilt top for straight edges and prepare your batting and backing fabric with a bit of extra size. This extra space compensates for any movement during the quilting process. Once you’re ready, secure your quilt layers with basting spray to prevent shifting and get ready to quilt with precision and power.
Applying Wrestling Strategies to Quilting
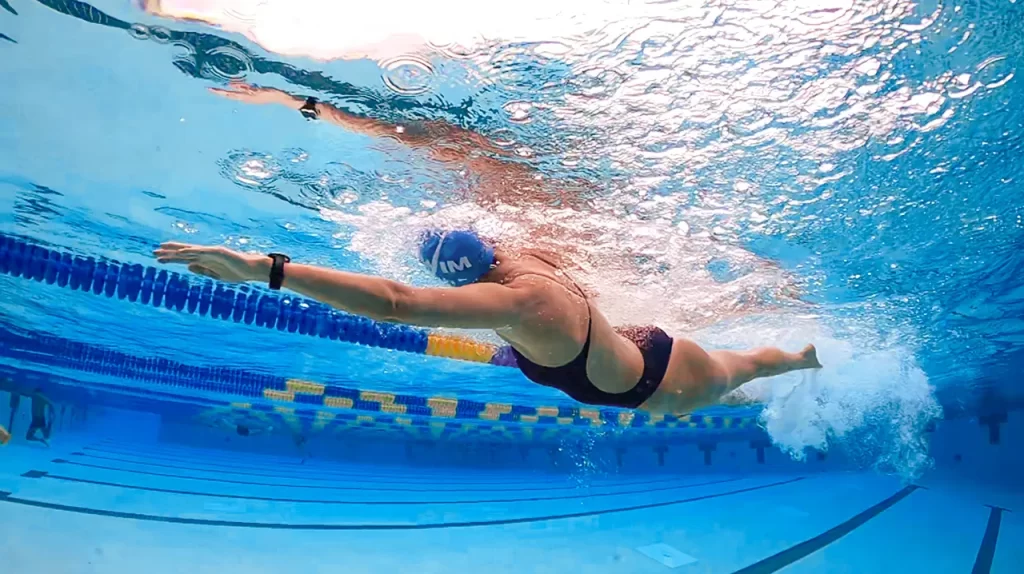
Just like a wrestler needs to master the kick in freestyle swimming to maintain power and control in the water, quilters can apply similar strategies to manage their fabric. Think of your quilt as an opponent that you need to maneuver with precision and skill. Here’s how to apply those wrestling techniques to your quilting projects:
- Stay grounded: Keep your feet firmly planted and your body balanced. This will give you the stability you need to handle the quilt with confidence.
- Breath control: Just as you need to know how to breathe in freestyle swim, learning to control your breathing while quilting can help you stay relaxed and focused.
- Strategic movements: Plan your stitching path like a wrestler would plan their moves. Anticipate where you need to go next and how to best get there without getting tangled.
While there’s no one-size-fits-all approach to quilting, incorporating these strategies can lead to a more controlled and enjoyable quilting experience.
Remember, the key to success in both wrestling and quilting is practice. The more you quilt, the better you’ll become at managing the fabric and creating beautiful designs. So, take a deep breath, plant your feet, and get ready to wrestle your way to quilting victory.
Learning from Champions: Quilting with Precision and Power
Just like Michael Phelps freestyle swimming, quilting champions know that precision and power come from consistent practice and fine-tuning techniques. It’s not just about the number of hours you put in, but also about how you use them.
Start by setting clear goals for each quilting session. Are you focusing on stitch consistency, pattern complexity, or speed? Then, track your progress. A simple table can help you visualize improvements over time:
| Session | Focus Area | Achievements |
|---|---|---|
| 1 | Consistency | Even stitches |
| 2 | Complexity | Complex pattern |
| 3 | Speed | Faster completion |
Embrace the journey of quilting as a form of self-expression and personal mastery. The path to becoming a quilting champion is paved with patience, practice, and the willingness to learn from each stitch.
Remember, every champion was once a contender that refused to give up. So, take inspiration from the quilting greats and apply their dedication to your craft. With each project, challenge yourself to push the boundaries of what you can create.
Dive into the intricate world of quilting with our expert guide on ‘Hand Fighting Techniques in Quilting’. Discover the secrets to mastering fabric manipulation and enhance your quilting prowess. Whether you’re a seasoned quilter or just starting out, our comprehensive tips and tricks will help you wrestle with fabric like a pro. Don’t miss out on elevating your quilting skills—visit our website now for more insightful tutorials and join our vibrant community of craft enthusiasts!
Wrapping It Up: Your First Stitch to Free Motion Mastery
And there you have it, the basics to kickstart your free motion quilting journey! Remember, every quilter was once a beginner, so don’t be discouraged if your first stitches aren’t perfect. It’s all about the process, the practice, and the passion you pour into each piece. With the tips and techniques you’ve learned here, you’re well on your way to developing your own unique quilting style. So grab your materials, let your creativity flow, and stitch away! Don’t forget to check out our guide on foundation paper piecing to add another layer to your crafting skills. Share your progress and connect with fellow beginners—after all, quilting is not just about the patterns you create, but the community you weave together. Happy quilting!
Read more: Revolutionize Your Swim: Freestyle Drills for All Skill Levels
AUTHOR
Sang Nguyen
Sang Nguyen is a former national swimmer for Vietnam who has transitioned into coaching. With a passion for fostering a healthy swimming community and connecting like-minded individuals,......Read More
BLOG
Maybe You Are Interested
Good Swim Meet Snacks: What to Eat for Optimal Performance
Good nutrition is crucial for swimmers to maintain energy, recover quickly, and perform at their...
Read More...Optimizing Your Performance: The Best Diet for Swimming Training
Optimizing your performance in swimming is not just about rigorous training; it’s equally crucial to...
Read More...Achieve Peak Performance with This Diet Chart for Swimmers
Whether you’re a novice or an expert swimmer, understanding the right diet is crucial for...
Read More...Eating Like a Champion: Exploring the Diet of Michael Phelps
Michael Phelps, renowned for his Olympic triumphs, has a diet as extraordinary as his swimming...
Read More...A Comprehensive Diet Plan To Gain Weight For Swimmers
Swimming is a demanding sport that requires meticulous attention to nutritional needs to optimize performance,...
Read More...Nutritional Guidelines for Young Swimmers: Optimizing Performance
Navigating the nutritional needs of young swimmers is crucial for enhancing performance and maximizing their...
Read More...